
Thank you WordPress Team! Webpack and Babel now come packaged in WordPress, time to start building some custom Gutenberg Blocks without spending time, a lot of time setting up your local build setup. Being a PHP developer first, dealing with all of the new JavaScript and the React framework, I spent many hours trying to just set up my local WordPress instance just to start building.
Now with the newest version of WordPress 5.2.1, Webpack and Babel come baked into WordPress core ready to compile your ESNext JavaScript code.
Let us take a look and build a very basic block using these new features.
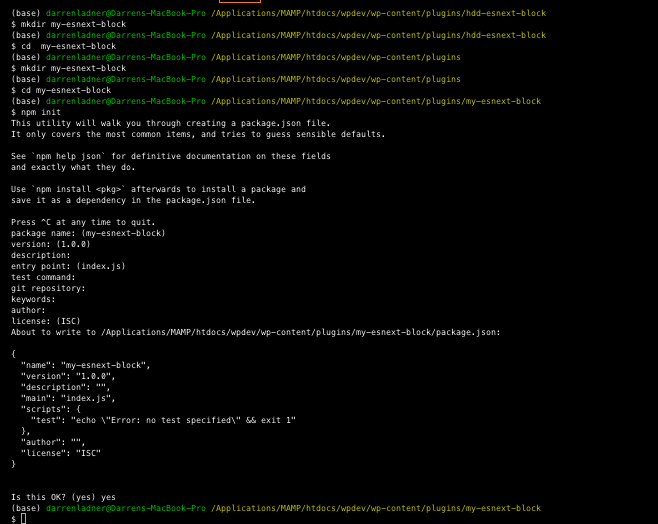
In my plugins folder, I am going to create a new directory using the terminal in my VSCode editor.
mkdir my-esnext-blockthen lets cd into the new directory
cd my-esnext-blocknow let’s create a package.json file in this directory run this command in your terminal:
npm init
The next step is to install the packages required. You can install packages using the npm command npm install. If you pass the –save-dev parameter, npm will write the package as a dev dependency in the package.json file. The –save-exact parameter instructs npm to save an exact version of a dependency, not a range of valid versions. See npm install documentation for more details.
So using the terminal, and you are still in your new plugin directory run:
npm install --save-dev --save-exact @wordpress/scriptsAfter installing, a node_modules directory is created with the modules and their dependencies which will include everything you need to start coding using React JS and ESNext JS.
Also, if you look at the package.json file it will include a new section:
"devDependencies": {
  "@wordpress/scripts": "3.1.0"
}
The @wordpress/scripts package handles the dependencies and default configuration for Webpack and Babel. The scripts package expects the source file to compile to be found at src/index.js, and will save the compiled output to build/index.js.
With that in mind, let’s set up a basic block. Create a new folder called src and a new file called index.js with the following content:
Since this tutorial mainly covers the wordpress scripts block package, we will just use the block code from the wordpress github repo for examples of gutenberg blocks located here: https://github.com/WordPress/gutenberg-examples
const { __, setLocaleData } = wp.i18n;
const { registerBlockType } = wp.blocks;
const blockStyle = {
backgroundColor: "#900",
color: "#fff",
padding: "20px"
};
registerBlockType("gutenberg-examples/example-01-basic-esnext", {
title: __("Example: HDD Basic (esnext)", "gutenberg-examples"),
icon: "universal-access-alt",
category: "layout",
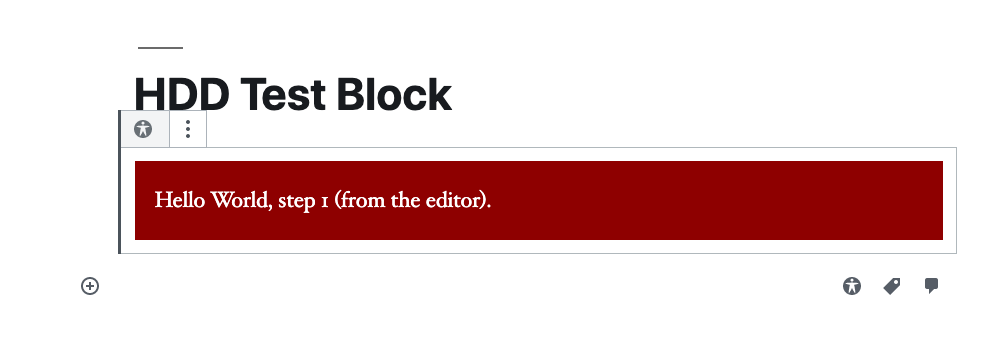
edit() {
return <div style={blockStyle}>Hello World, step 1 (from the editor).</div>;
},
save() {
return (
<div style={blockStyle}>Hello World, step 1 (from the frontend).</div>
);
}
});
now lets register our block
we will create our plugins main php file index.php and place the following code in this new file:
<?php
/**
 * Plugin Name: Gutenberg HDD Examples Basic EsNext
 * Plugin URI: https://github.com/WordPress/gutenberg-examples
 * Description: This is a plugin demonstrating how to register new blocks for the Gutenberg editor.
 * Version: 1.0.2
 * Author: the Gutenberg Team
 *
 * @package gutenberg-examples
 */
defined( 'ABSPATH' ) || exit;
/**
 * Load all translations for our plugin from the MO file.
*/
add_action( 'init', 'gutenberg_examples_01_esnext_load_textdomain' );
function gutenberg_examples_01_esnext_load_textdomain() {
	load_plugin_textdomain( 'gutenberg-examples', false, basename( __DIR__ ) . '/languages' );
}
/**
 * Registers all block assets so that they can be enqueued through Gutenberg in
 * the corresponding context.
 *
 * Passes translations to JavaScript.
 */
function gutenberg_examples_01_esnext_register_block() {
	if ( ! function_exists( 'register_block_type' ) ) {
		// Gutenberg is not active.
		return;
	}
	wp_register_script(
		'gutenberg-examples-01-esnext',
		plugins_url( 'build/index.js', __FILE__ ),
		array( 'wp-blocks', 'wp-i18n', 'wp-element' ),
		filemtime( plugin_dir_path( __FILE__ ) . 'build/index.js' )
	);
	register_block_type( 'gutenberg-examples/example-01-basic-esnext', array(
		'editor_script' => 'gutenberg-examples-01-esnext',
	) );
  if ( function_exists( 'wp_set_script_translations' ) ) {
    /**
     * May be extended to wp_set_script_translations( 'my-handle', 'my-domain',
     * plugin_dir_path( MY_PLUGIN ) . 'languages' ) ). For details see
     * https://make.wordpress.org/core/2018/11/09/new-javascript-i18n-support-in-wordpress/
     */
    wp_set_script_translations( 'gutenberg-examples-01-esnext', 'gutenberg-examples' );
  }
}
add_action( 'init', 'gutenberg_examples_01_esnext_register_block' );
Now we need to use the wordpress scrips package and convert our React code in our index.js file for the build process. In the package json file we need to tell it what to use to build. Add the following to your package.json file in your new plugins folder.
"scripts": {
  "start": "wp-scripts start",
  "build": "wp-scripts build"
},
for development, you can use ‘npm run start’
for production, you can use ‘npm run build’
Final package.json file:
{
  "name": "my-esnext-block",
  "version": "1.0.0",
  "description": "",
  "main": "index.js",
  "scripts": {
    "start": "wp-scripts start",
    "build": "wp-scripts build"
  },
  "author": "",
  "license": "ISC",
  "devDependencies": {
    "@wordpress/scripts": "3.2.1"
  }
}
Now using the terminal run this command:
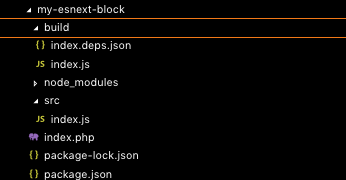
npm run buildAfter using npm run build command and there are no errors in our terminal we should have a build folder with our index.js file located in there.
so here is what our plugin file folder structure looks like:
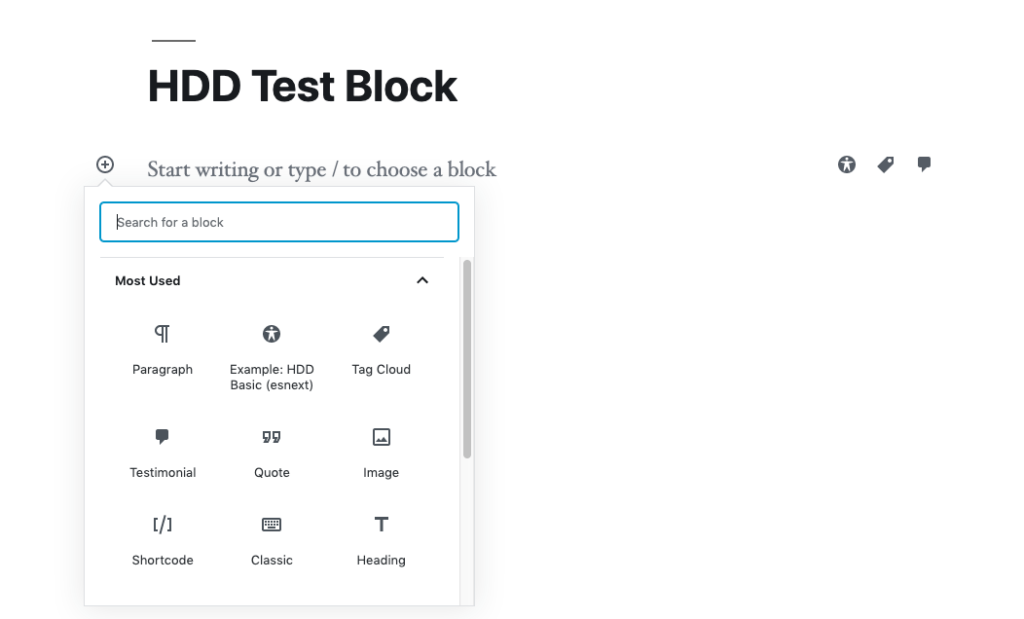
We should be able to see our new block in the editor
And here it is on the front end:

Again, Kudos to the WordPress team for getting this build package into core and saving everyone so much time. This new feature allows us to start building new Gutenberg blocks much quicker without the headache of setting up Webpack. Theme developers can start using it also. Just create a package.json file in the theme root directory, create a src/index.js folder file in the theme root, and start writing your React code. Be sure you are in theme root when you do all of your terminal commands.